Wednesday, May 29, 2013

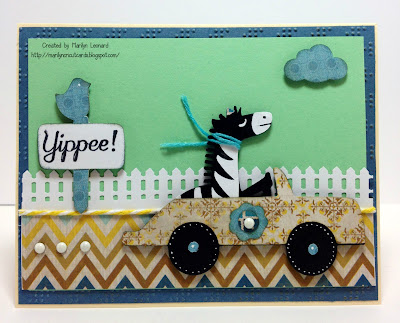
Zebra in a Car

Operation Write Home Midweek Throwdown:  The challenge is transportation.

A2 sized card = 5.5" x 4.25"
Card Recipe:
Mat 1 (blue) = 5 3/8" x 4 1/8".  Mat embossed with Cuttlebug "Charles" folder.
Mat 2 (light green) = 5" x 3.75".
Mat 3 (chevron pattern) = 1.25" x 5".  Paper from My Mind's Eye Nutmeg pack.
Fence = 1" x 5".  Punch made by Martha Stewart.
Baker's Twine = from the Paper Studio.
White Brads = from Imaginisce.
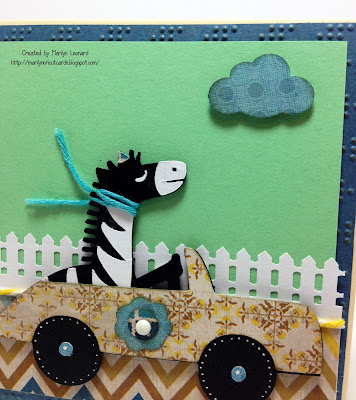
Zebra from Cricut Paisley cartridge
Zebra in Car = cut at 2.5" from Cricut Paisley cartridge; found on page 71 of folder.  Pattern papers from My Mind's Eye Nutmeg pack.  Zebra and car mounted with foam tape.  Stitching around tires created with white gel pen.
Twine around neck of Zebra = Sew Easy twine.
Cloud = from Frisker's punch.  Paper from My Mind's Eye Nutmeg pack.  Edges inked with Tim Holtz Faded Jeans Distress Ink.  Cloud mounted with foam tape.

Bird on Sign Post from Cricut Songbird cartridge
Bird and Sign Post = cut at 1.5" using flip feature from Cricut Songbird cartridge; found on page 67 of folder.  Paper from My Mind's Eye Nutmeg pack.  Image mounted with foam tape.  Edges inked with Tim Holtz Faded Jeans Distress Ink.
Sentiment "Yippee!" = from Scrappy Mom's "Designer's Choice" stamp set.

Inside of Card
Inside of Card:
Mat 1 (brown pattern) = 5" x 3.75".  Paper from My Mind's Eye Nutmeg pack.
Mat 2 (white) = 4.5" x 3.5".
Cloud = m Frisker's punch. Paper from My Mind's Eye Nutmeg pack. Edges inked with Tim Holtz Faded Jeans Distress Ink.

Bird and Sign Post from Cricut Songbird cartridge
Bird and Sign Post = cut at 1.5" from Cricut Songbird cartridge; found on page 67 of folder. Paper from My Mind's Eye Nutmeg pack.  Stitching created with white gel pen.
 

Monday, May 27, 2013

The Sky's the Limit

Fantabulous Cricut Challenge - Memorial Day 2013.  The challege this week is to create a card or project celebrating Memorial Day.  I decided upon this little vintage airplane from the Heritage cartridge and used patriotic colors of red, white and blue.

A2 sized card = 5.5" x 4.25"
Heritage cartridge
Plantin SchoolBook cartridge
Card Recipe:
  • Mat 1 (red / white polka dot pattern) = 5 3/8" x 4 1/8".  Paper from Recollections.  Edges inked with Tim Holtz Faded Jeans Distress Ink.
  • Mat 2 (blue) = 4.75" x 3.5".   Edges inked with Tim Holtz Faded Jeans Distress Ink.
  • Mat 3 (white border) = 3.5" x 1.25".
  • Mat 4 (blue border) = 3.5" x 1".  Mat embossed with the Paper Studio Tiny Stars folder.  White ink rubbed over raised stars to help them stand out.

Airplane found in the Cricut Hertiage cartridge

  • Airplane = cut at 1.75" from Cricut Heritage cartridge;   found on page 58 of the folder.  Plane was cut four times and glued together to create a chipboard effect.  White gel pen used for stitching.
  • Cloud = punch from Fiskers.  Punched 4 times and mounted together for chipboard effect.  Paper from Recollections.

Tag found in the Cricut Plantin SchoolBook cartridge
  • Twine = from the Paper Studio.
  • Tag = cut at 1.75" from Cricut Plantin SchoolBook cartridge; found on page 78 of the folder.  Tag is mounted on one end with foam tape (where it extends off of twine.)
  • Sentiment "The Sky's The Limit!" = from Scrappy Mom's "Designers Choice" stamp set.

Inside of Card
Inside of Card:
  • Mat 1 (blue) = 5" x 3.75".
  • Mat 2 (red) = 4.75" x 3.5".
  • Mat 3 (white) = 4.5" x 3.25".

Cloud Punch from Fiskers
  • Cloud = from Fiskers punch.  Paper from Recollections.

MCCR - Father's Day


Today's card celebrates Father's Day.  And what better way than having Dad busy at the Grill?

A2 sized card = 5.5" x 4.25"
Elegant Edges
Block Party
Card Recipe:
  • Mat 1 (blue) = 5 3/8" x 4 1/8"
  • Mat 2 (pattern) = 5.25" x 4".  Paper from Authentique "Hope."  Edges inked with Tim Holtz Antique Linen Distress Ink.

Grilling Dad from Block Party
Mat from Elegant Edges
  • Mat 3 = cut image and shadow at 4" from Elegant Edges; found on page 29 of the folder.   Mat is mounted with foam tape.  Paper from Authentique "Hope."
  • Dad Grilling = cut at 4.5" from Block Party; found on first column of folder.  Parts of image are mounted with foam tape where image extends from mat.
  • Brads = from Imaginisce.

Sentiment from Scrappy Mom's "Alphabet Soup"
  • Sentiment = from Scrappy Mom's "Alphabet Soup" stamp set.
  • Mats for sentiment = from Scrappy Mom's Metal Craft Dies.  Blue shadow was hand cut.   Sentiment images mounted with foam tape.

Inside of Card
Tongs from Block Party
Inside of Card:
  • Mat 1 (blue) = 5" x 3.75".
  • Mat 2 (beige) = 4.75" x 3.5".

Happy Father's Day!

  • Tongs = cut at 1.5" from Block Party; found on last fold of folder.
** June 14, 2013 - Thank you Fantabulous Cricut Challenge Blog for including my card on your Father's Day Post.

Sunday, May 26, 2013

Thankful Heart

With a Thankful Heart


A2 Sized Card = 5.5" x 4.25"
Card Recipe:
  • Mat 1 (turquoise) = 5 3/8" x 4 1/8"
  • Mat 2 (diamond pattern) = 5.25" x 4".  Paper from My Mine's Eye "Up and Away" pack.  Edges inked using Tim Holtz Tea Dye Distress Ink.
  • Mat 3 (turquoise) = 4.5" x 3.5".  Edges inked using Tim Holtz Tea Dye Distress Ink.
  • Mat 4 (chevron pattern) = 4.25" x 3.25".  Paper from My Mine's Eye "Up and Away" pack. Edges inked using Tim Holtz Tea Dye Distress Ink.
  • Mat 5 (turquoise) = 4 3/8" x 2.75".  Edges inked using Tim Holtz Tea Dye Distress Ink.
  • Mat 6 (pink circus tent pattern) = 4.25 x 2.5".  Paper from My Mine's Eye "Up and Away" pack. Edges inked using Tim Holtz Tea Dye Distress Ink.

Cricut A Child's Year Cartridge
  • Girl with Ice Cream Cone = cut image and shadow at 2.75" from Cricut A Child's Year cartridge; found on page 41 of folder.  I cut the image three times and layered together to create a chipboard effect.  Image mounted with foam tape.
  • Heart Border = from Martha Stewart Punch.  4 5/16" x 1".   Paper from My Mine's Eye "Up and Away" pack.

  • Hearts = from Martha Stewart punch.  I layered three of the punched hearts together to create a chipboard effect.  (9 hearts in all, each with 3 heart layers).
  • Sentiment = "Thankful Heart" = from CardzTV "Heartfelt Wishes" stamp set.  Stamp in whole is "With a Thankful Heart". I covered the "With a" portion with scotch tape before inking.  Then removed tape before stamping.
  • Ribbon and Bow = from Michaels.  Bow tied using Bow Easy.  Bow is attached on top of ribbon with hot glue.  Ends of bow are glued down to prevent coming loose from card.

Inside of Card

Inside of Card:
  • Mat 1 (turquoise) = 4.5" x 3.5".
  • Mat 2 (beige) = 4.25" x 3.25".


  • Heart Border = created using Martha Stewart punch.   Paper from My Mine's Eye "Up and Away" pack.
  • Small Hearts = left over from front of card punch.  Only one layered hearts.

My card was created using Operation Write Home Sketch #174.


You're Only Young Once

You're only young once.  You can be immature for a Lifetime.

A2 sized card = 5.5" x 4.25".
Card Recipe:
  • Mat 1 (green) = 5 3/8" x 4 1/8".
  • Mat 2 (pink pattern) = 5.25" x 2.25".  Paper from My Mind's Eye "Find Your Wings and Fly."
  • Mat 2 (black and white pattern) = 5.25" x 1.5".  Paper from My Mind's Eye "Find Your Wings and Fly."
  • Mat 3 (green border) = 5.25" x .25".

Sentiment from Inkadinkado
  • Mat 4 (green under sentiment) = 3.25" x 2.75".  Mat embossed with Cuttlebug "Charles" folder.  Mat mounted on foam tape.
  • Sentiment = You're only young once.  You can be immature for a Lifetime." = from Inkadinkado "Humorous Birthday" stamp set.  Image colored using colored pencils.  Edges of sentiment mat inked with Tim Holtz Peeled Paint Distress Ink.

Inside of Card
Inside of Card:
  • Mat 1 (green) = 5.25" x 4".
  • Mat 2 (beige) = 4.75" x 3.5".
  • Flower = created using Martha Stewart punch.  Center of flower is Liquid Pearls.


Saturday, May 25, 2013

OWH Memorial Day Blog Hop


The theme for Operation Write Home Blog Hop is :  Thank You Cards based on a OWH sketch.  Here is my card:


Cricut Give a Hoot
Cricut Old West

Inside of card:


Echo Park Dots & Stripes "Bundle of Joy"


My card was based on OWH Sketch # 101.

For more information on how my card was made, please visit my blog post here.

Thanks for visiting! ~ Marilyn

Friday, May 24, 2013

Many Thanks

My card was created for the Operation Write Home Memorial Day Blog Hop on May 25, 2013.   The theme is Thank You Cards based on a OWH Sketch.

Here is my card:


A2 sized card = 5.5" x 4.25"
Cricut Give a Hoot
Cricut Old West
Card Recipe:
  • Mat 1 (light blue) = 5 3/8" x 4 1/8".
  • Mat 2 (green pattern) = 1" x 4 1/8" (before punching).   EK Success Scalloped Scallop punch used to create top.  Paper from Echo Park Dots & Stripes "Bundle of Joy" pack. 
  • Mat 3 (brown polka dot) = 2" x 4 1/8".  Paper from Echo Park Dots & Stripes "Bundle of Joy" pack. 
  • Pennants = cut at 1" from Cricut Give a Hoot cartridge: found on page 43 of the folder.  I cut the pennant tops four times using four different papers from the Echo Park Dots & Stripes "Bundle of Joy" pack. 
  • Sign Post & Grass = cut at 3" from Cricut Old West cartridge; found on page 67 of the folder.  Paper from Echo Park Dots & Stripes "Bundle of Joy" pack.  Sign Post mounted with foam tape.
  • Sentiment "Many thanks!" = from CardzTV "Heartfelt Wishes" stamp set.
  • Clouds = from Fishers punch.  Clouds are inked with Tim Holtz Faded Jeans Distress Ink and mounted with foam tape.
  • Twine = from the Paper Studio.  I put a small bead of glue down to permanently attach the twine.


Inside of Card
Cricut Old West

Inside of Card:
  • Mat 1 (blue) = 4.5" x 3.75".
  • Mat 2 (beige) = 4.25" x 3.5".
  • Sign Post = cut at 2" from Cricut Old West cartridge; found on page 67 of the folder. Paper from Echo Park Dots & Stripes "Bundle of Joy" pack.
Card based on Operation Write Home Sketch #101:

Monday, May 20, 2013

Cards in Envy - Challege #4 Make Your Own Background

There's a new challenge at Cards in Envy.  This time we are challenged to create a card by making our own background.  I decided to create a starburst card following a tutorial from Operation Write Home. 


Starburst card - A2 = 5.5" x  4.25"
DP from DCWV Mainstreet Stack

To create this card:
  • Cut a piece of cardstock 5.25" x 4" to attach the starburst rays onto.  This piece will not be viewable when done.
  • Cut several coordinating cardstock pieces at 4.5" x 1.5".  I choose three different cardstocks from DCWV Mainstreet Stack.
  • Cut each of the 4.5" x 1.5" pieces in half on the diagonal.  Ink the edges of each with Tim Holtz Tea Dye Distress Ink.
  • Tape each diagonal cut around the 5.25" x 4" cardstock cut.  Trim off edges to create a clean looking starburst. 
  • Cut a 5.25" x 4" mat (green tweed).   Attach starburt to mat and attach to card base.
  • Punch a 1" circle (solid green).  Attach butterfly (from Martha Stewart punch).  Mount with foam tape where all starburst cuts come to a point.  White gel pen and Liquid Pearls used to create the antennae of butterfly.
Inside of Card

Inside of card:
  • Mat 1 (green tweed) = 5" x 3.75".  Paper from DCWV Mainstreet Stack.
  • Mat 2 (beige) = 4.75" x 3.5".
  • Butterflies = from Martha Stewart punch.

Saturday, May 18, 2013

MCCR - Patriotic Children


This patriotic card was created using My World and A Child's Year cartridges.

Card Recipe:
  • Mat 1 (dark blue) = 5 3/8" x 4 1/8".
  • Mat 2 (stripe pattern) = 5.25" x 4".  Paper from My Mine's Eye "Oxford Lane.".
  • Mat 3 (blue border) = 5 3/8" x 1".   Mat has been embossed using The Paper Studio "Tiny Stars" folder.


  • Flag = cut at 3.75" from My World cartridge; found on page 25 of the folder.  Liquid Pearls added for the 13 stars.   Red gem added to top of flag pole.


  • Children with Flags = cut image and shadow at 2.75" from A Child's Year cartridge; found on page 45 of folder.  Children image partially mounted with foam tape where it extends off of flag.
  • Stars = cut three at .25" from A Child's Year cartridge; found on page 45 of folder.

Inside of Card:
  • Mat 1 (blue) = 4.75" x 3.75".
  • Mat 2 (red) = 4.75" x 3.75".
  • Mat 3 (white) = 4.5" x 3.5".


  • Stars = cut at .5" from A Child's Year cartridge; found on page 45 of folder.

Thursday, May 16, 2013

MCCR - Water Things


The theme for My Cricut Craft Room today is Festive Water Things.  I created an underwater scene card using Cricut cartridges Create a Critter and Life is a Beach.


A2 sized card = 5.5" x 4.25"
Create a Critter
Life is a Beach
 Card Recipe:
  • Mat 1 (light blue) = 5 3/8" x 4 1/8".  Mat has been embossed using Cuttlebug Spots and Dots folder.
  • Water = cut at 5 3/4" from Create a Critter found on page 43 of the folder.  I cut on at 5" that was too small, so I just layered that underneath, which created the multiple waves.  Top of Water is inked with Tim Holtz Faded Jeans Distress Ink.  Paper is from Recollections Primary Pin Dot Card stock.
  • Sand = Cut two at 5 3/4" from Create a Critter found on page 43 of the folder.  You'll need two because one is too short to fit card.  Top of Sand inked with Tim Holtz Antique Linen Distress Ink.


Close up of Fish and Water Bubbles

  • Fish = cut at 3/4" from Create a Critter found on page 43 of the folder.  I opted not to use Layer 2 or Layer 3 for my fish.  Tail of fish has Liquid Pearls. 
  • Water Bubbles = cut two at 1/2" and one at 3/4" from Create a Critter found on page 43 of folder.  (top layer for the sand dollar) I used the same light blue paper as the background.  I added Mod Podge Dimensional Magic to top and let dry overnight before adding to the card.  Once is dries it becomes clear and has little air bubbles in it.  Fish is mounted with foam tape.


Close up of Sun

  • Sun = cut at 1 3/4" from Create a Critter found on page 52 of the folder.  Outer edge of sun has Stickles added to it.  Sun is mounted with foam tape.


Close up of Treasure Chest

  • Kelp = cut at 1 3/4" from Create a Critter found on page 42 of the folder.  Edges inked using Tim Holtz Peeled Paint Distress Ink. 
  • Seahorse = cut at 1 1/4" using the "flip button" from Create a Critter found on page 42 of folder. 
  • Starfish = cut at 3/4" from Create a Critter found on page 41 of folder.  I didn't use the layer for mine.  Starfish has Liquid Pearls added.
  • Treasure Chest = cut at 1 1/2" from Life is a Beach found on page 75 of the folder.  Gold Stickles and Liquid Pearls added.  Treasure Chest has one layer of foam tape on bottom and two layers of foam tape on lid.
  • "Jewels" in Treasure Chest = bling from my stash.  Purchased at Michael's.


Close up of Star Fish

  • Coral = cut at 1 1/2" from Create a Critter found on page 43 of folder.  Purple Stickles has been added to it.
  • Seahorse = cut at 1 1/4" from Create a Critter found on page 42 of folder.


Inside of Card
Create a Critter
Life is a Beach
 Inside of Card:
  • Mat 1 (blue) = 5" x 3.75".
  • Mat 2 (beige) = 4.75" x 3.5".
  • Coral = cut at 1 1/4" from Create a Critter found on page 43 of folder. Purple Stickles has been added to it.
  • Starfish = cut at 3/4" from Create a Critter found on page 41 of folder. I didn't use the layer for mine. Starfish has Liquid Pearls added.
  • Anchor = cut at 1 1/2" from Life is a Beach found on page 76 of the folder.
Inspiration for this card came from Live Love and Scrap.


Tuesday, May 14, 2013

Birthday Bike

Have a Rockin' Birthday!

A2 sized card = 5.5" x 4.25"
Cricut Boys Will Be Boys
Card Recipe:
  • Mat 1 (green) = 5 3/8" x 4 1/8".
  • Mat 2 (yellow pattern) = 5" x 3.75".  Paper from My Mind's Eye "Sky's the Limit" pack.  Edges inked with Tim Holtz Antique Linen Distress Ink.
  • Mat 3 (chevron pattern) = 5" x 2.255".  Paper from My Mind's Eye "Sky's the Limit" pack. Edges inked with Tim Holtz Antique Linen Distress Ink.
  • Mat 4 (black border) = 5" x .25".
  • Bike = cut at 3" from Cricut Boys Will Be Boys cartridge; found on page 34 of the folder.  Stickles added to pedal.  Bike mounted with foam tape.
  • Brads = from Imaginisce.
  • Sentiment "Have a ROCKIN' Birthday" = from Scrappy Mom's "Hooray for Birthdays" stamp set.

Inside of Card

Inside of Card:
  • Mat 1 (chevron pattern) = 5" x 3.75".  Paper from My Mind's Eye "Sky's the Limit" pack. 
  • Mat 2 (beige) = 4.5" x 3.5".

Monday, May 13, 2013

Rockin' Birthday

Have a Rockin' Birthday!

Dump Truck
A2 sized card = 5.5" x 4.25"
Cricut Boys Will Be Boys Cartridge
Cricut Elegant Edges Cartridge

Card Recipe:
  • Mat 1 (polka dot) = 5 3/8" x 4 1/8".  Paper from K&Company Itsy Bitsy Baby Boy pack.  Edges inked with Tim Holtz Antique Linen Distress Ink.
  • Mat 2 & 3 (blue stamp shapes) = cut at 3" from Cricut Elegant Edges cartridge  found on page 37 of folder.  Edges inked with Tim Holtz Faded Blue Jeans Ink.
  • Dump Truck and Round Mats = cut image and shadow at 3" from Cricut Boys Will Be Boys cartridge; found on page 28 of the folder.  White gel pen and glitter gel pen used to create stitching on truck.  Truck shadow inked with Tim Holtz Faded Jeans Distress Ink.  Headlight on truck has Stickles topped with Glossy Accents.  Truck is mounted with foam tape. 
  • Sentiment "Have a ROCKIN' Birthday!" = Scrappy Mom's "Hooray for Birthdays" stamp set.
  • Brads = from Imaginisce.

Inside of Card
Inside of Card:
  • Mat 1 (car pattern) = 5" x 3.75".  Paper from K&Company Itsy Bitsy Baby Boy pack. 
  • Mat 2 (yellow) = 4.5" x 3.5".


Operation Write Home Sketch #172

I used Operation Write Home sketch #172 to create my card.